My Tools
Outers Universal 62-piece cleaning kit: This kit has everything needed to clean barrels from .17 caliber to 12-gauge shotguns. Its multiple brass sectional cleaning rods are versatile. It includes bronze brushes, push jags, eyelet jags, and mops in many calibers and gauges. Multiple plastic muzzle guides, three hand brushes, and patches are included. The whole ensemble is neatly contained in a hard case with formed liners.
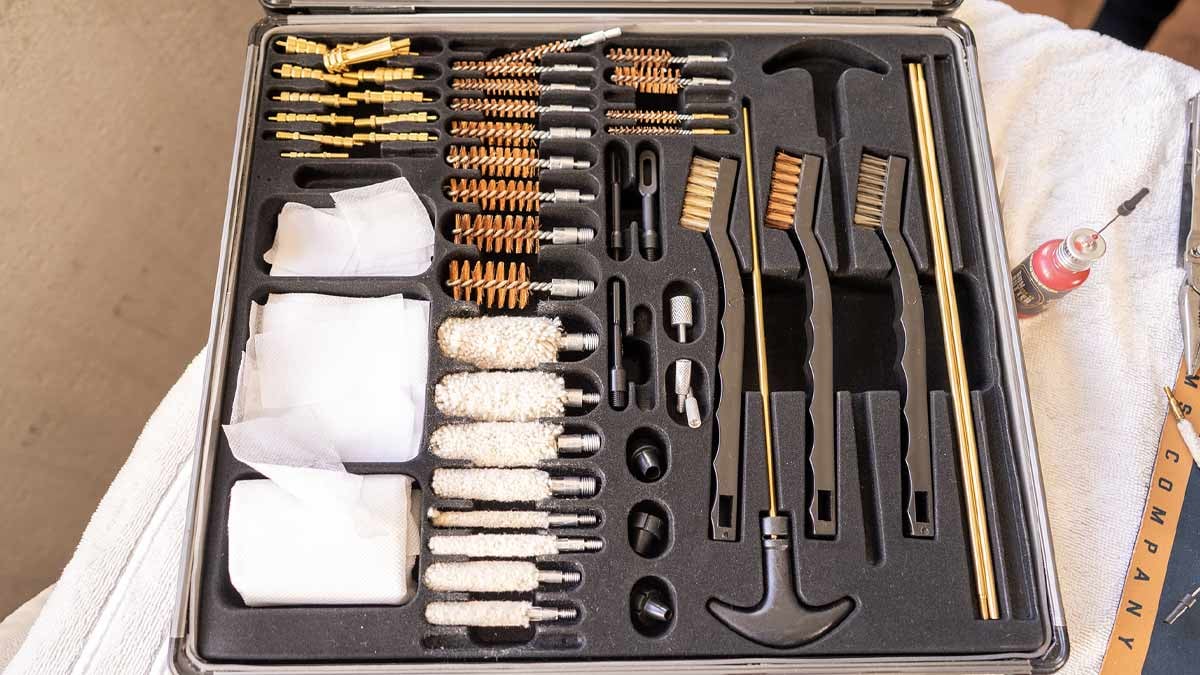
The Outers Universal kit is a bit overkill if you only own one gun, but if you are like me and own a few in various calibers and gauges, then you will find it a great one-stop box. The brass sectional cleaning rods are great. The thin .17-caliber rods will clean my air rifle, air pistol, and my .17 HMR Ruger Model 77. This is important considering the popularity of the .17 HMR cartridge and the many companies offering firearms for it.
The larger diameter brass rods are used for .22-caliber through .45-caliber rifles and handguns. There are adapters to allow attachment of larger shotgun diameter brushes and jags from .410 to 12-gauge sizes. Speaking of jags, there are many sizes and gauges to choose from. I like the push-jag style for my rifles. They allow me to move debris from breech to muzzle in a continuous motion.
The eyelet jags are useful in handgun cleaning, which requires barrel access from the muzzle only. The various mop jags will absorb solvent or deliver oil to barrel and chamber surfaces. All these devices and bronze brushes are stamped with the appropriate caliber or gauge for convenience. Rounding out the kit is a supply of patches, caliber-specific bore guides, and three hand brushes made of nylon, bronze, or stainless steel. These allow light to heavy removal of the toughest carbon fouling on any firearm.
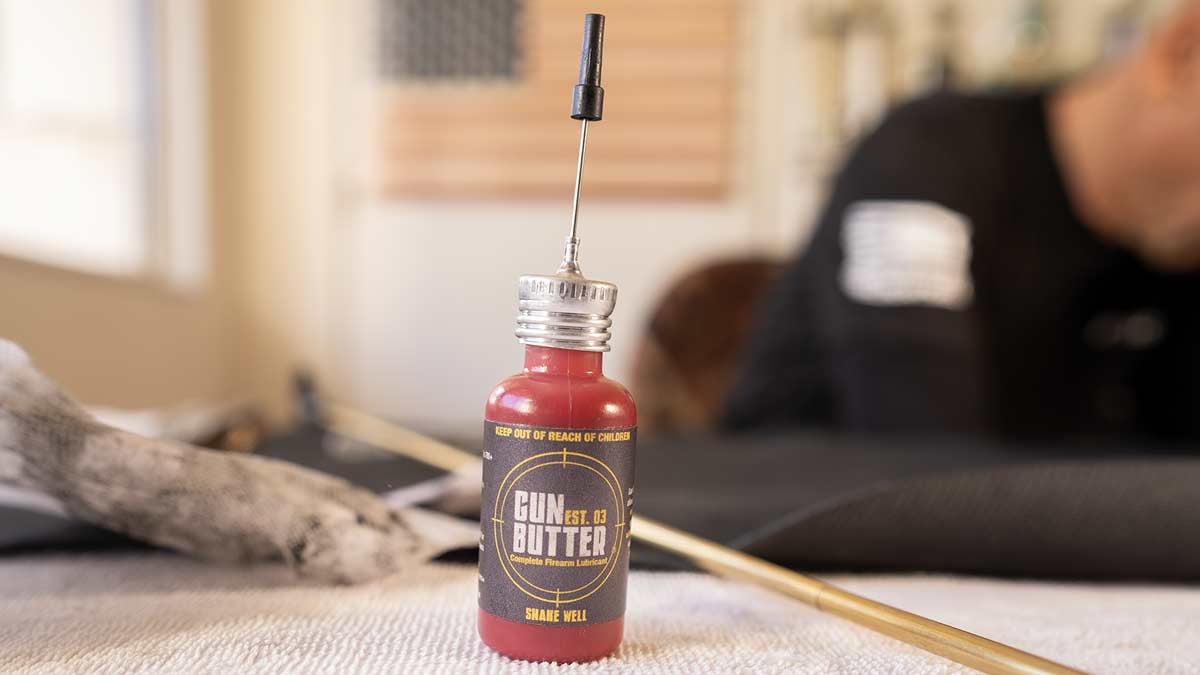
Gun Butter: I use the 1-ounce container with a needle oiler. The butter stays in place and repels dirt, sand, and water, with rust and storage protection for over two years.
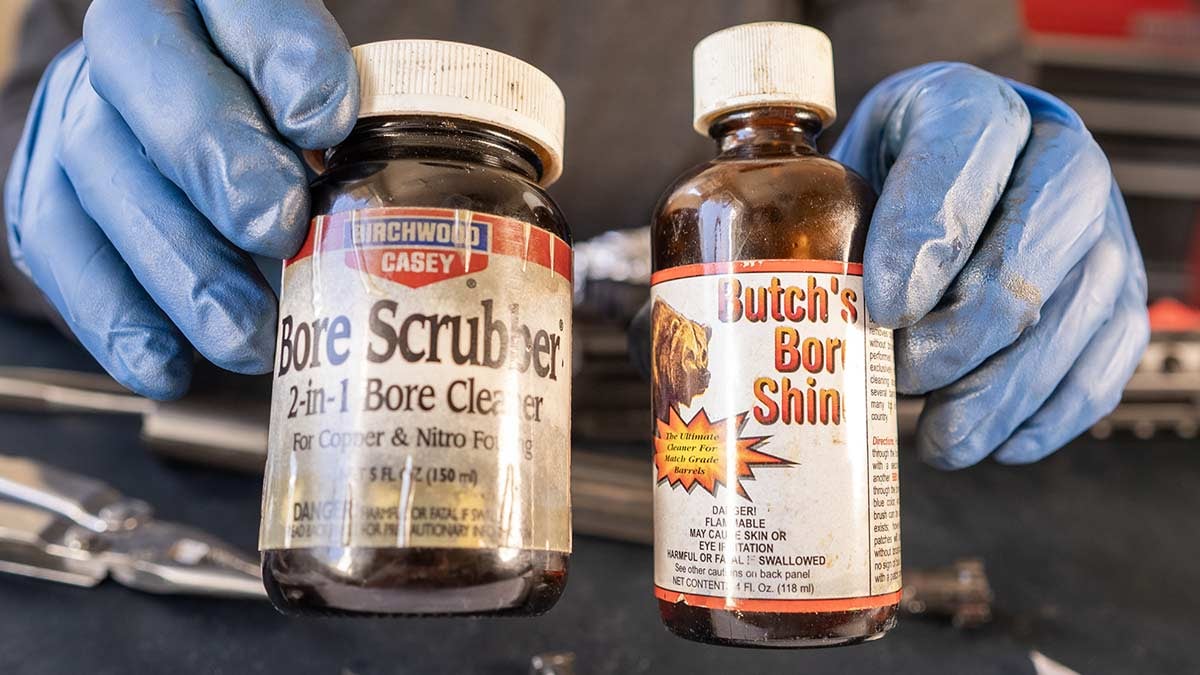
Solvent: Various brands of solvent are available, but my favorites are Butch’s Bore Shine, Birchwood Casey Bore Scrubber, and Hoppes No. 9.
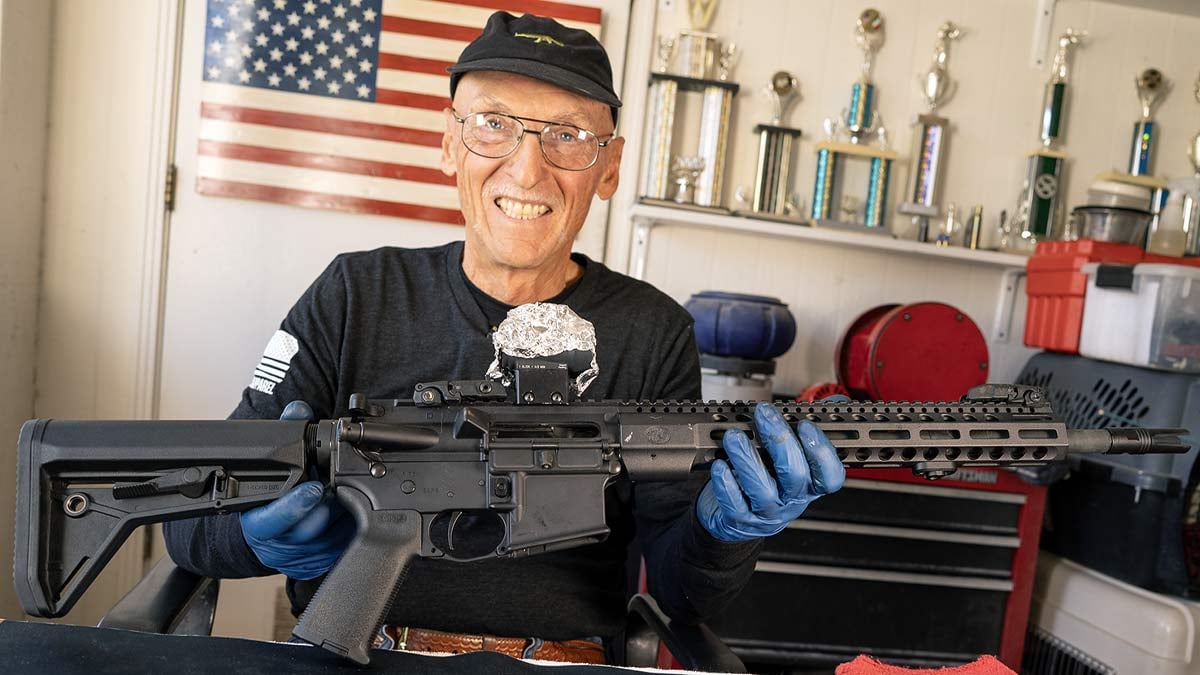
Nitrile gloves: I like a 7mm thickness on these.
1. Disassemble the Rifle
First, open the action and make sure the gun is unloaded. Wear eye protection. Nitrile gloves are recommended to protect your hands from penetrating solvents.
An AR-15 platform rifle chambered in .223 must withstand chamber pressure of 52,000 psi and will achieve velocities up to 3,250 FPS. That means my FN 15 rifle will become dirty and gummed up without proper cleaning and lubrication.
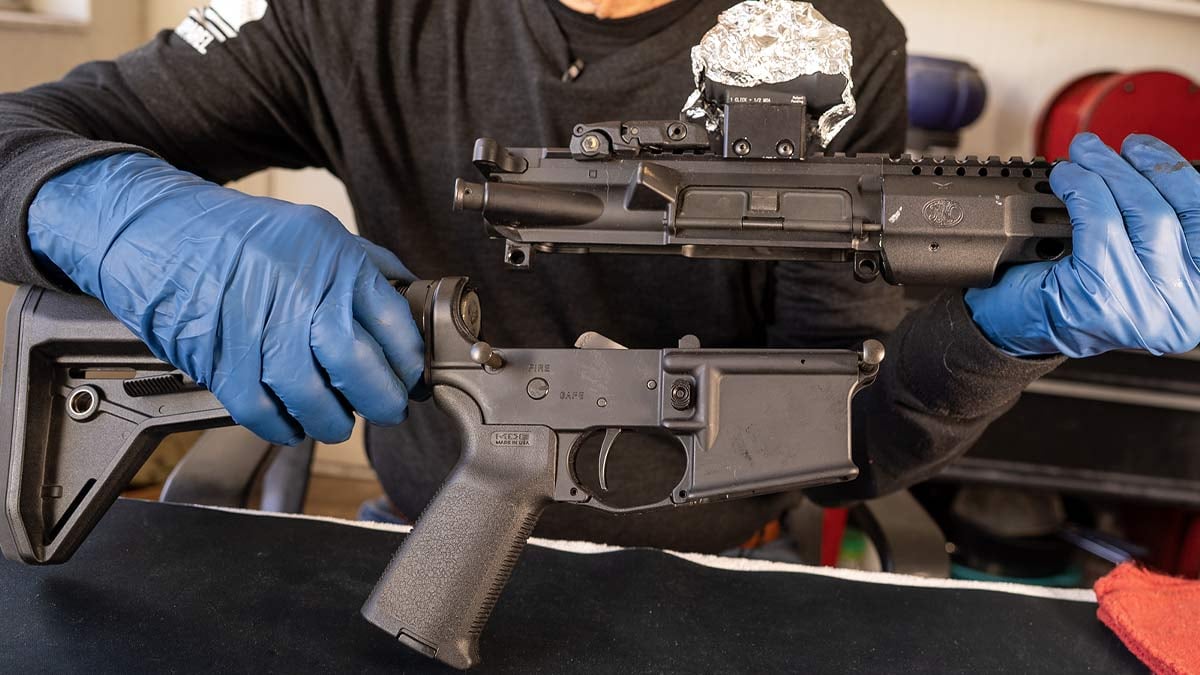
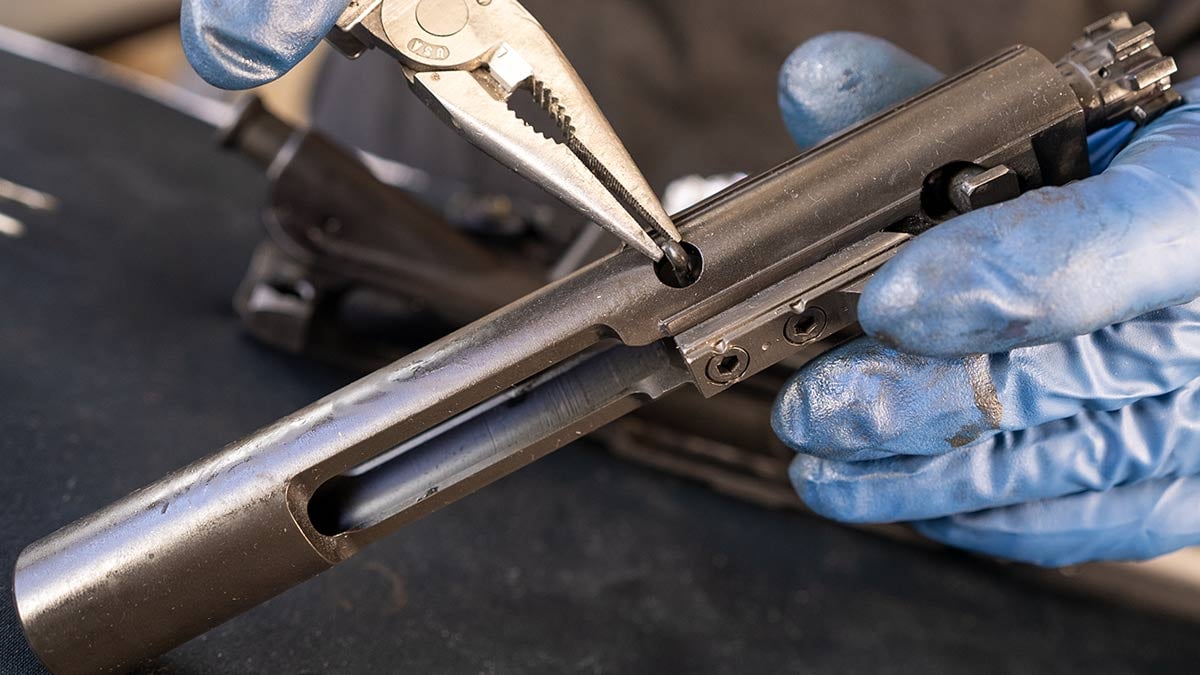
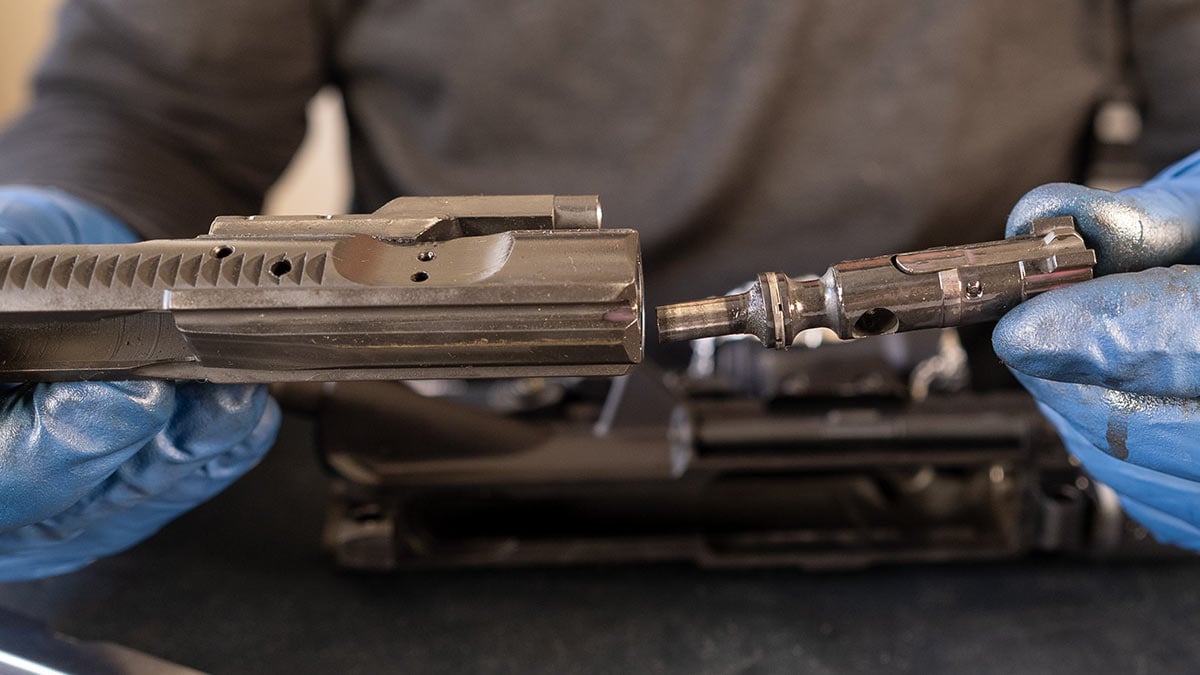
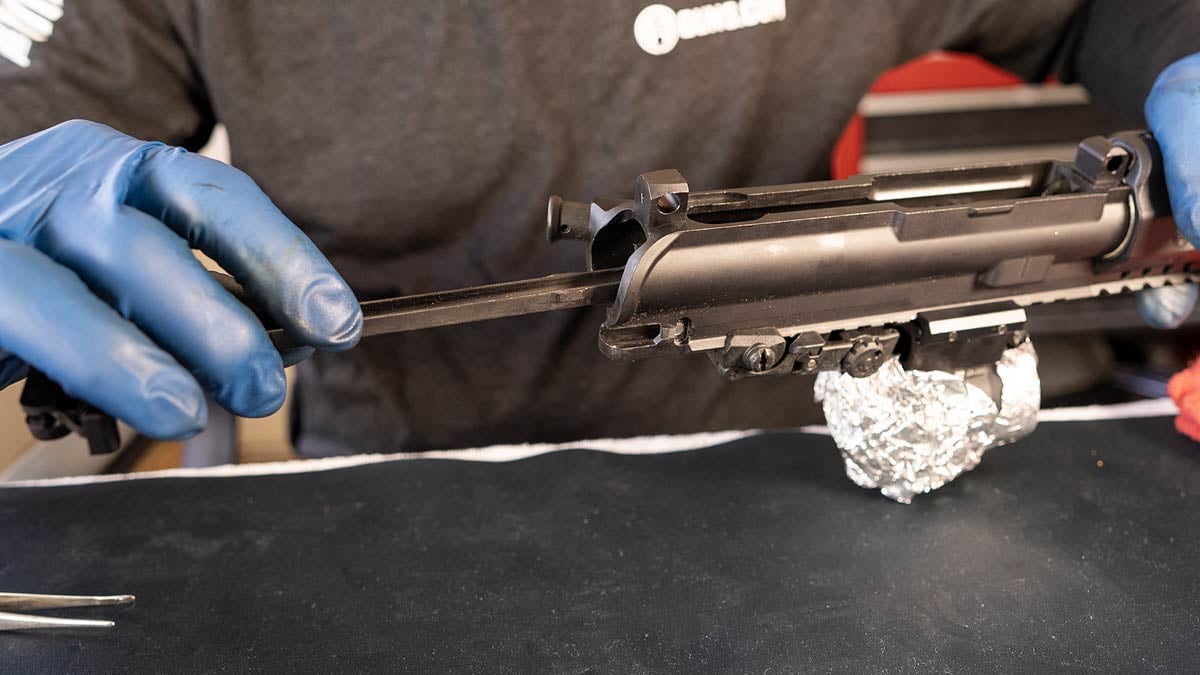
Separation of the upper and lower receivers is next. Be sure that the bolt carrier assembly is forward and push both pins out from left to right using fingers, a punch, or similar object. Notice that the two pins remain captive of the lower receiver. The two halves may now be separated. I will begin on the upper assembly, as it is the most fouled.
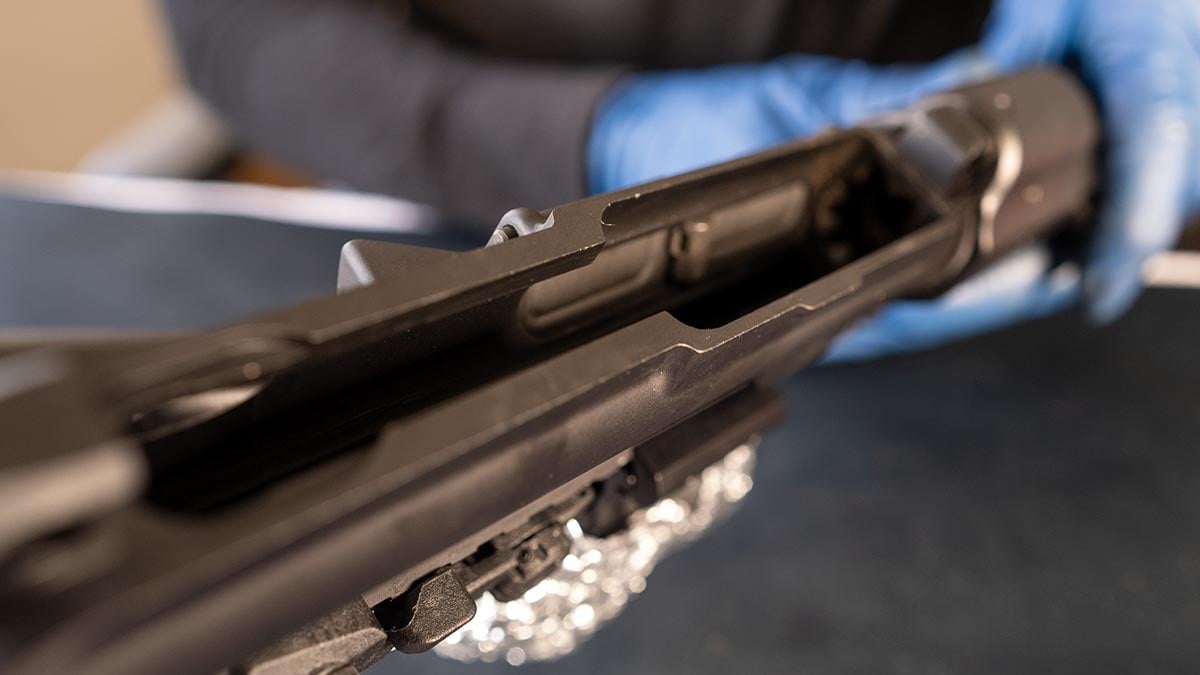
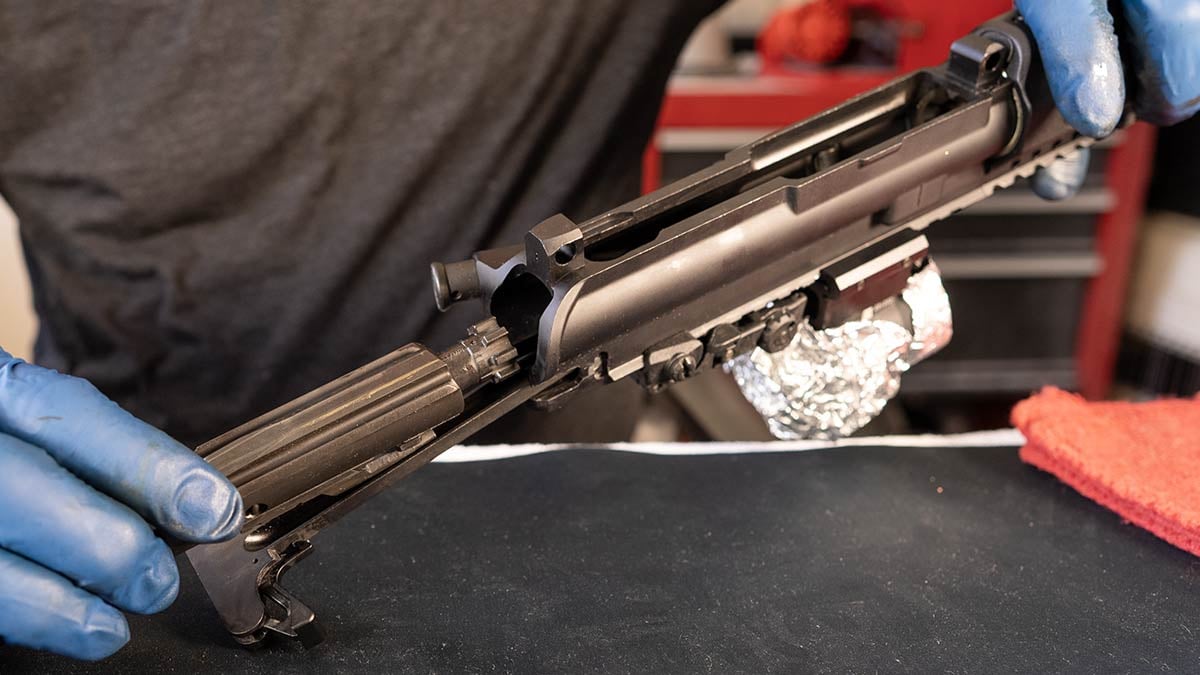
With the upper receiver inverted, remove the bolt carrier assembly by pulling it from the rear with the charging handle. Lift and pull back on the charging handle to remove it as well. Note the lugs on the charging handle that must fit into the receiver to reassemble it later.
2. Cleaning the Barrel
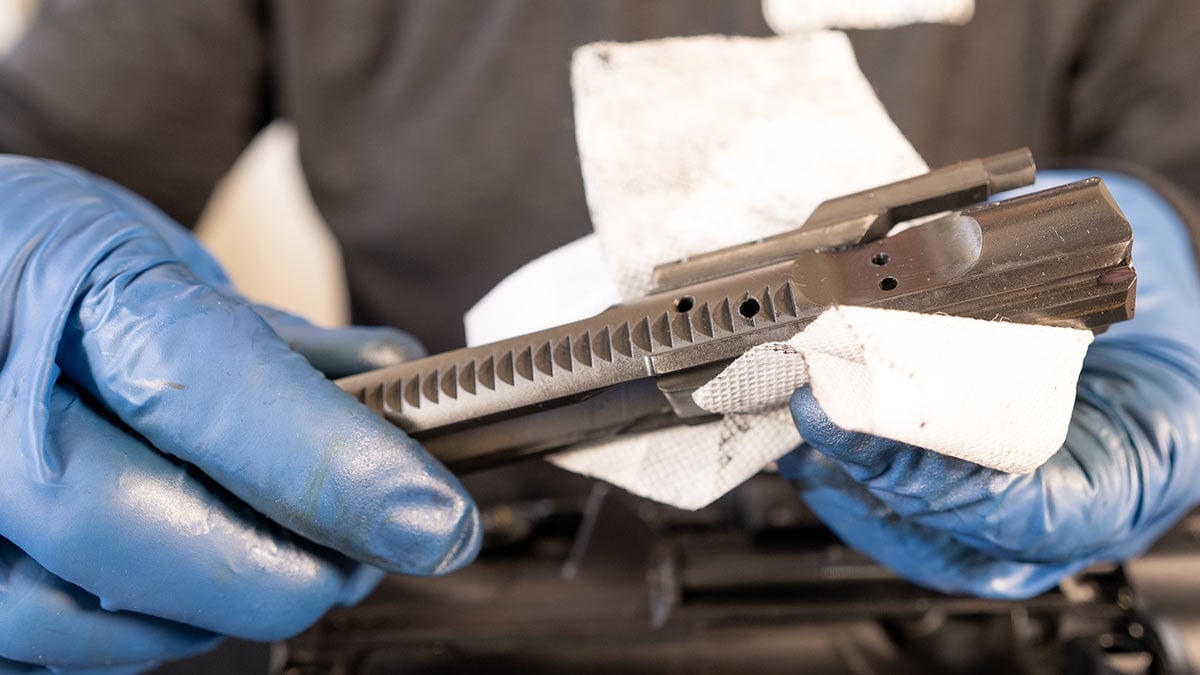
The barrel is the most important part of any rifle. It is crucial to accuracy and absorbs most of the punishment generated by this semi-automatic rifle.
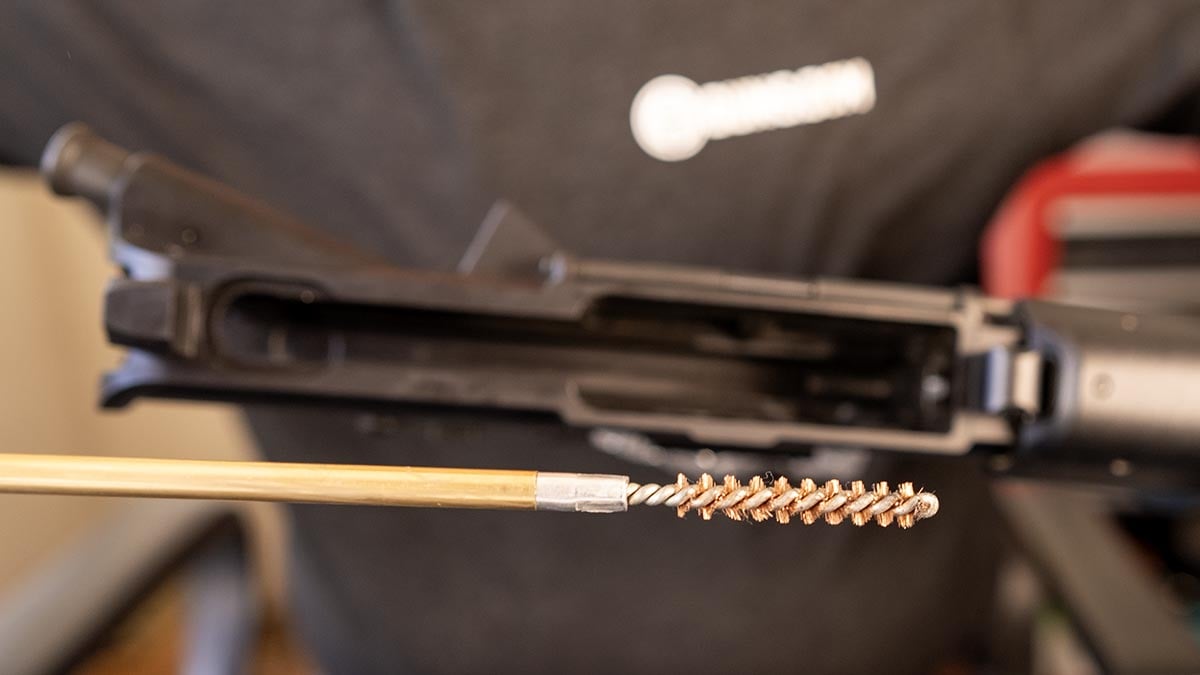
Start by assembling the .22-caliber sectional rod in adequate length to clear the combined length of the upper receiver and barrel. Next, attach a .22-caliber bronze brush and dip it in solvent. Insert it from the rear of the upper receiver and carefully push it through the breech and out the muzzle. Repeat this process with fresh solvent many times until all carbon and jacketed fouling is loosened.
Now, attach a .22-caliber brass push jag and cloth cleaning patch cut to roughly 1.25 inches square. Dip this in solvent and push it from breech to muzzle, allowing it to drop off at the muzzle as the rod is pulled back. Look at all that black junk on the patch! Continue this process with fresh patches until they are clean. It will take a while; have patience.
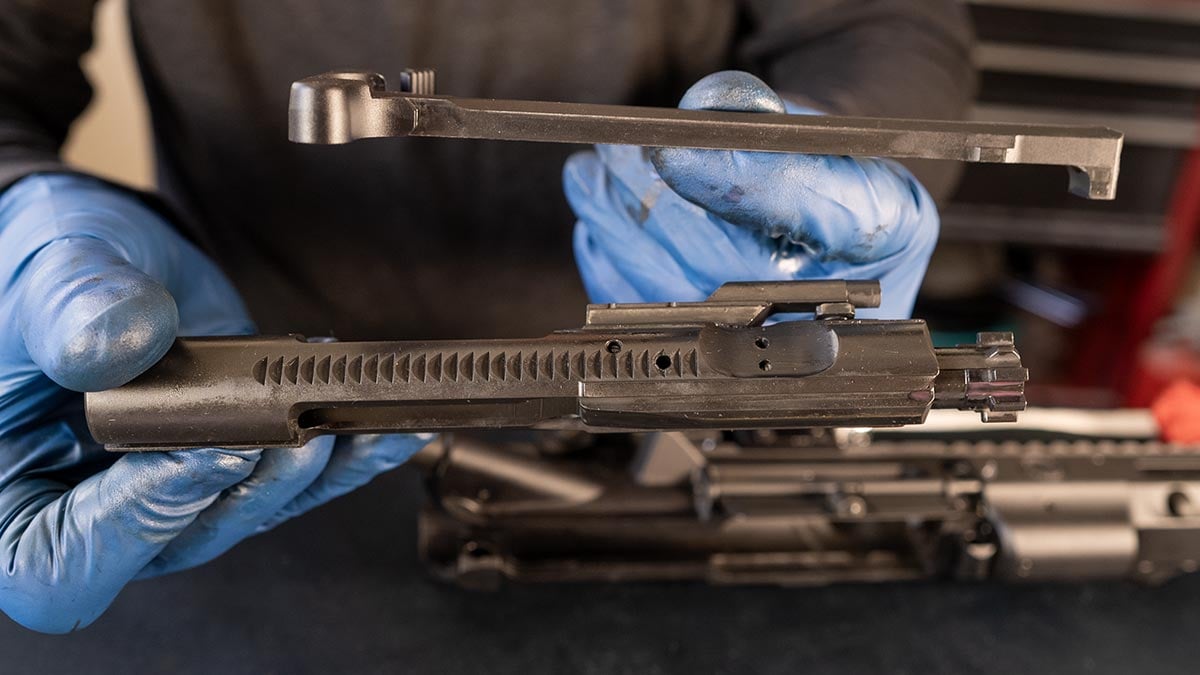
3. Bolt Carrier Disassembly And Cleaning
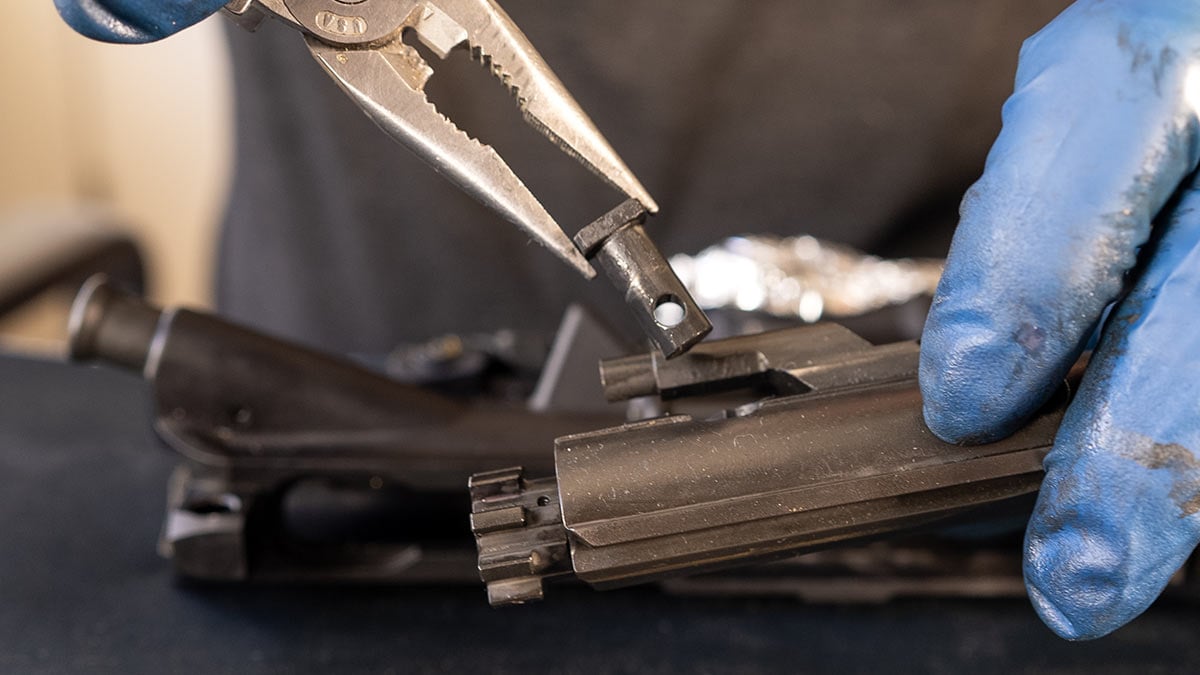
Start by pulling out the small cotter pin (retaining pin) from the left side of the bolt carrier. Use extreme care with this small part. It can slip and disappear quickly.
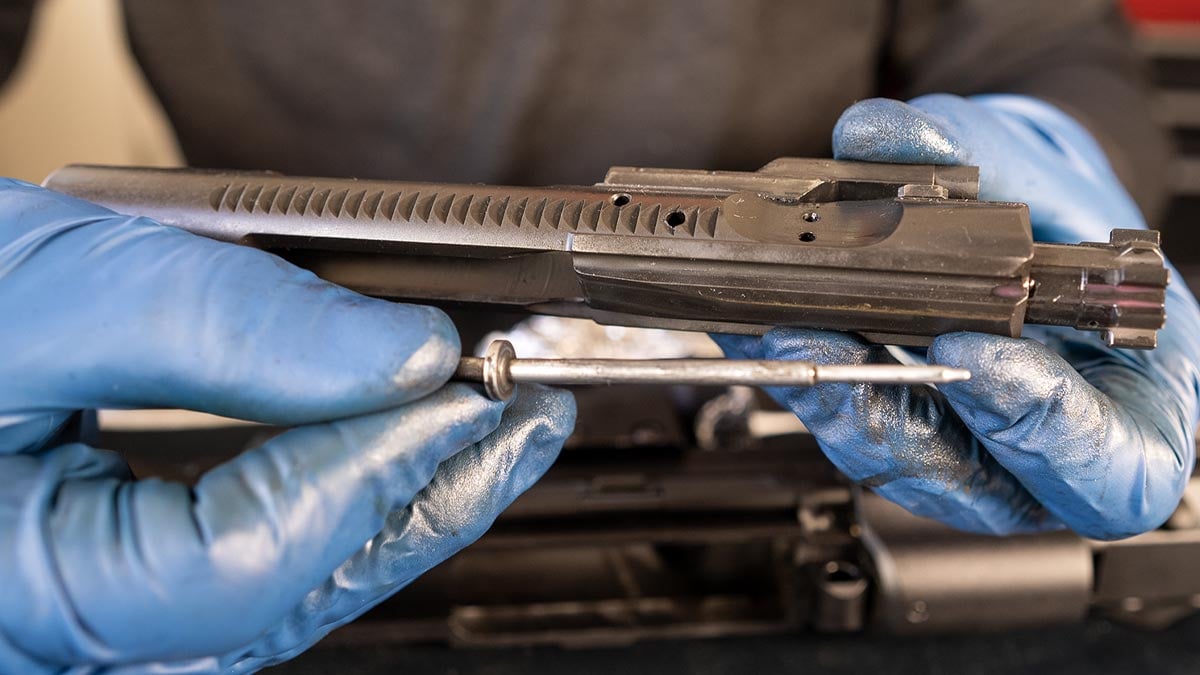
Next, with the assembly pointed up, remove the firing pin by pulling it straight down. Then turn the rectangular bolt cam pin and pull it straight out from the bolt carrier. The bolt may now be removed by pulling it forward from the bolt carrier assembly. No further disassembly is required.
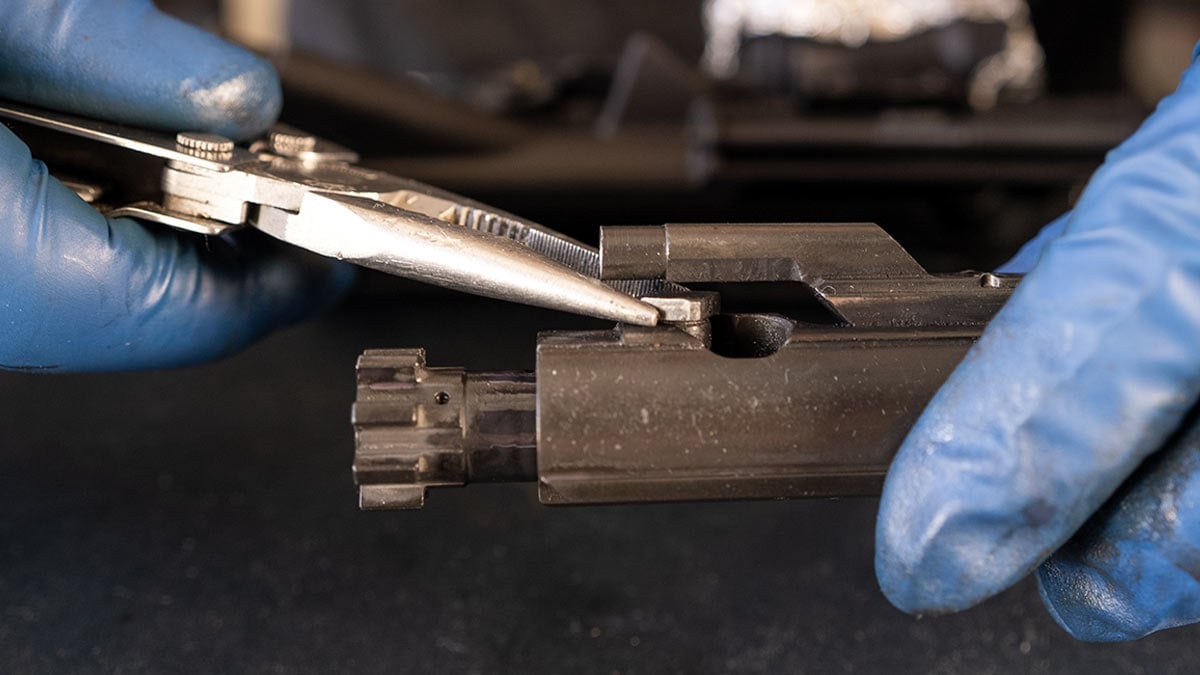
Notice the large amount of carbon buildup on the bolt surfaces and bolt face. This should be removed with bronze and stainless-steel hand brushes with plenty of bore solvent. Work at it slowly until it is all removed. These surfaces need to be clean to ensure reliability.
Clean the interior of the bolt carrier to remove all fouling. A cotton swab or pipe cleaner dipped in solvent are useful tools to clean the gas tube key on the top of the carrier. Also, clean the interior of the upper receiver to remove powder fouling.
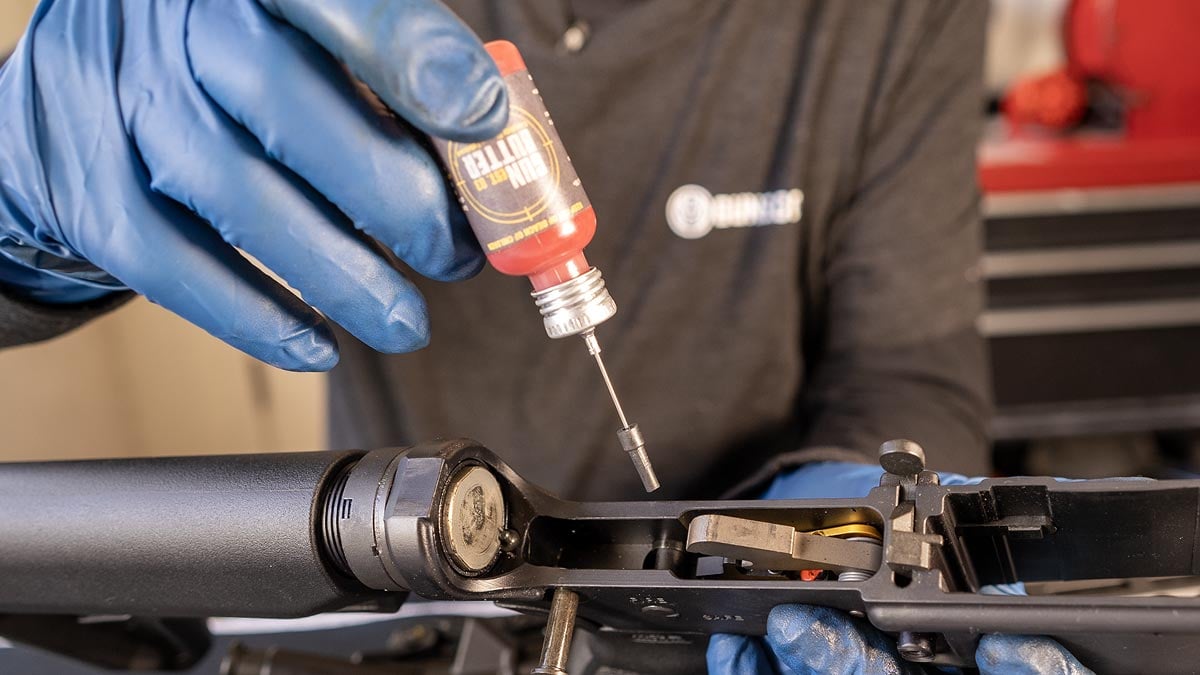
4. Gun Butter
Now that the rifle is clean, it must be lubricated. I love Gun Butter for this. It is red, so when I apply it I can see it going into tight spaces, and I know where I have oiled the firearm. It is a thick oil, but lighter than grease and slick to the touch.
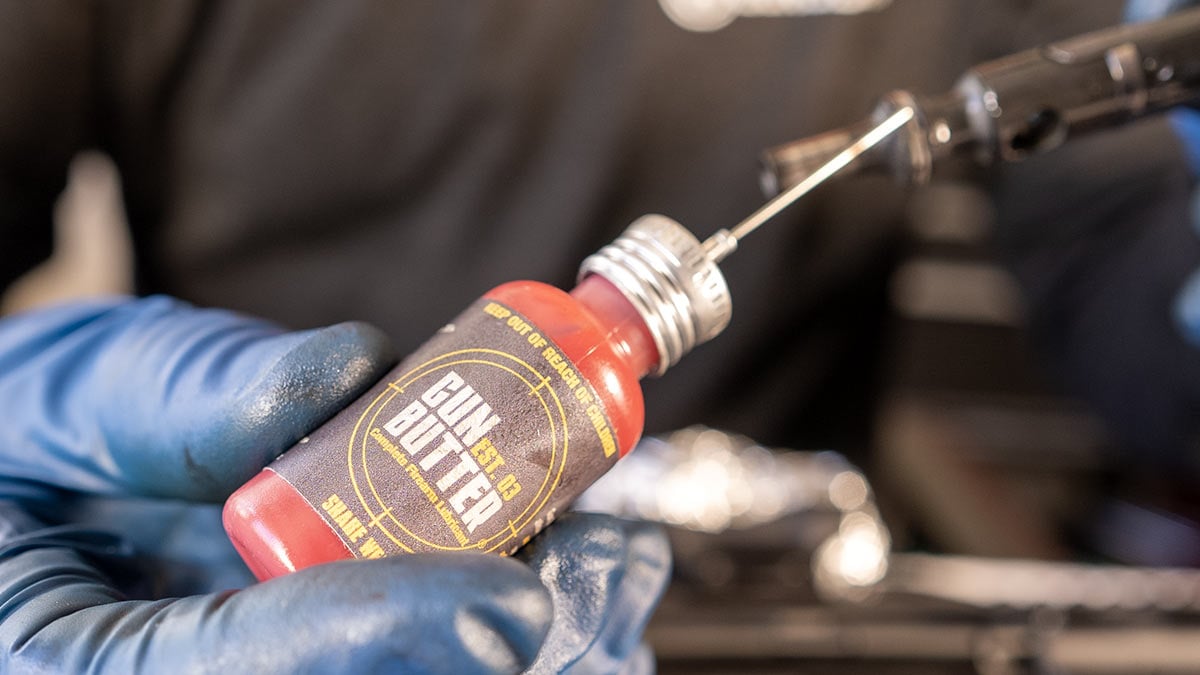
All moving parts described thus far should have a light coat of Gun Butter. The needle applicator is most handy in reaching the interior of the bolt carrier, the bolt extractor, and ejector. Move these parts with a punch or pliers gently as they are oiled. Work the oil into the mechanisms.
Now is a good time to lightly oil moving parts of the lower receiver. Take care not to release the hammer without holding it, as it may damage the mechanism. Cock the hammer and set the fire selector to safe position prior to reassembly.
5. Reassemble the Rifle
Insert the bolt into the carrier with the extractor facing the right side. Move the bolt a bit to align the cam pinhole in the bolt with the bolt carrier cam pinhole. Insert the cam pin with its rectangular lug aligned lengthwise with the carrier. Carefully insert the cam pin into the bolt, and once inserted, turn it 90 degrees to align the firing pin channel.
With the bolt carrier assembly pointed down and the bolt fully extended, drop the firing pin in through the rear of the carrier. Push it fully into place and replace the cotter pin (retaining pin) from the left side.
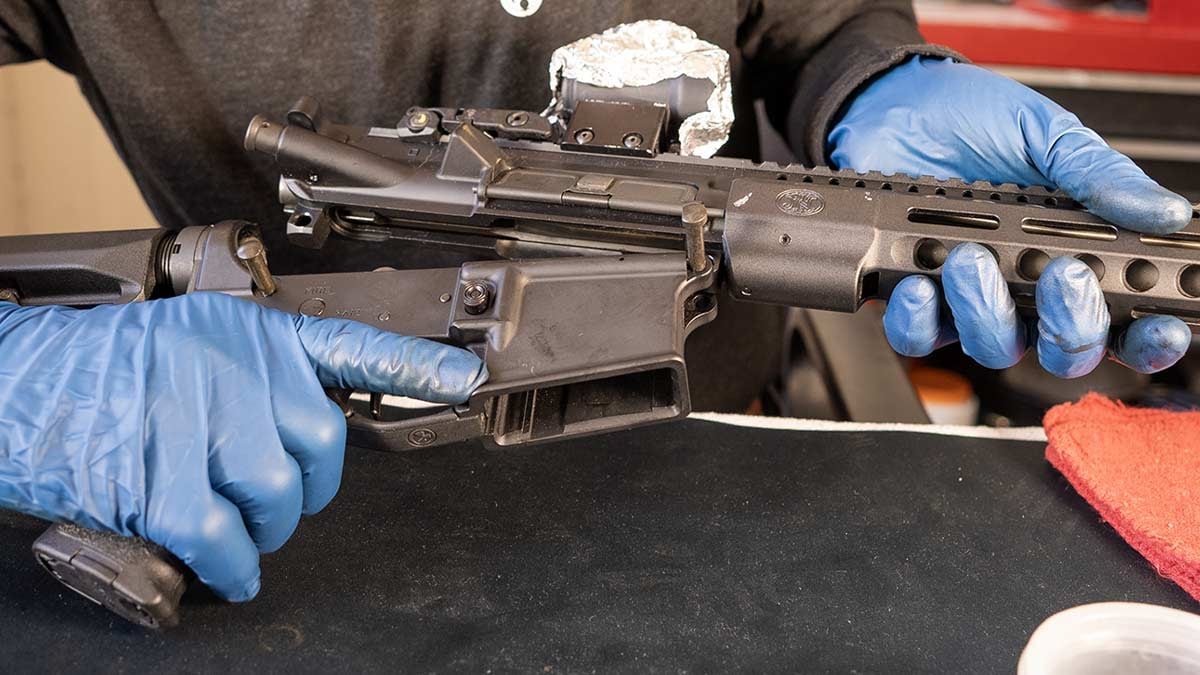
With the upper receiver inverted, insert the charging handle partway through the rear of the receiver and engage its lugs into the channel of the upper receiver. The bolt carrier assembly may now be inserted and pushed forward into its full locked position. Align upper and lower receivers and push the receiver retaining pins into place to complete assembly.
FINAL THOUGHTS
The AR-15 platform is not as easy to clean as a bolt-action rifle, but it is faster firing and more versatile, therefore worth the effort. Many times, when I have fired fewer than 20 rounds, I merely clean the barrel and put my rifle in storage until the next session.
The full treatment described above is needed after intense firing sessions such a 3-Gun match or other competition where hot fouling accumulates quickly. It is worth it to me because only reliable accurate rifles are of any use. Just like my truck, my gun must be clean.