1. Prep Tools & Sights
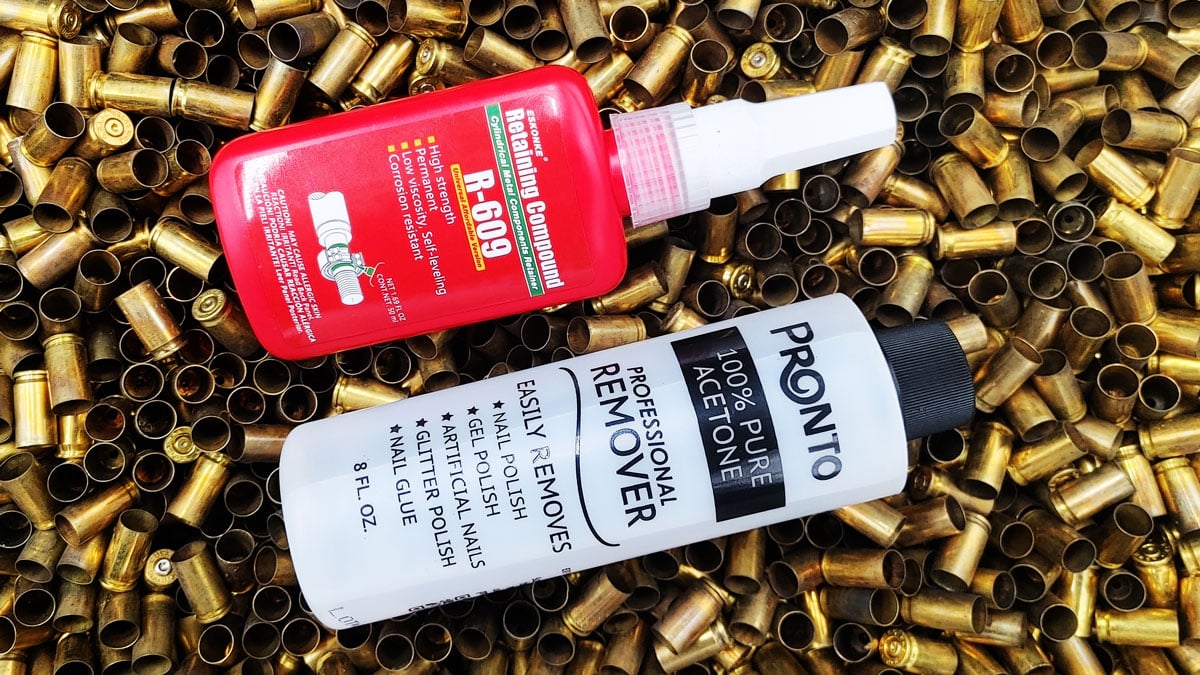
Properly installing sights on your Glock pistol requires some specific tools: sight pusher/punch, front sight 3/16-inch hex driver tool, and ideally some acetone for cleaning and threadlocker (green Loctite 609 in this case) to secure screws and the rear sight.

It’s worth noting that all the aftermarket Glock sights I’ve seen also universally recommend simply taking your sights to a gunsmith. That hasn’t always been an option for me, so I’ve had to do the work myself several times.
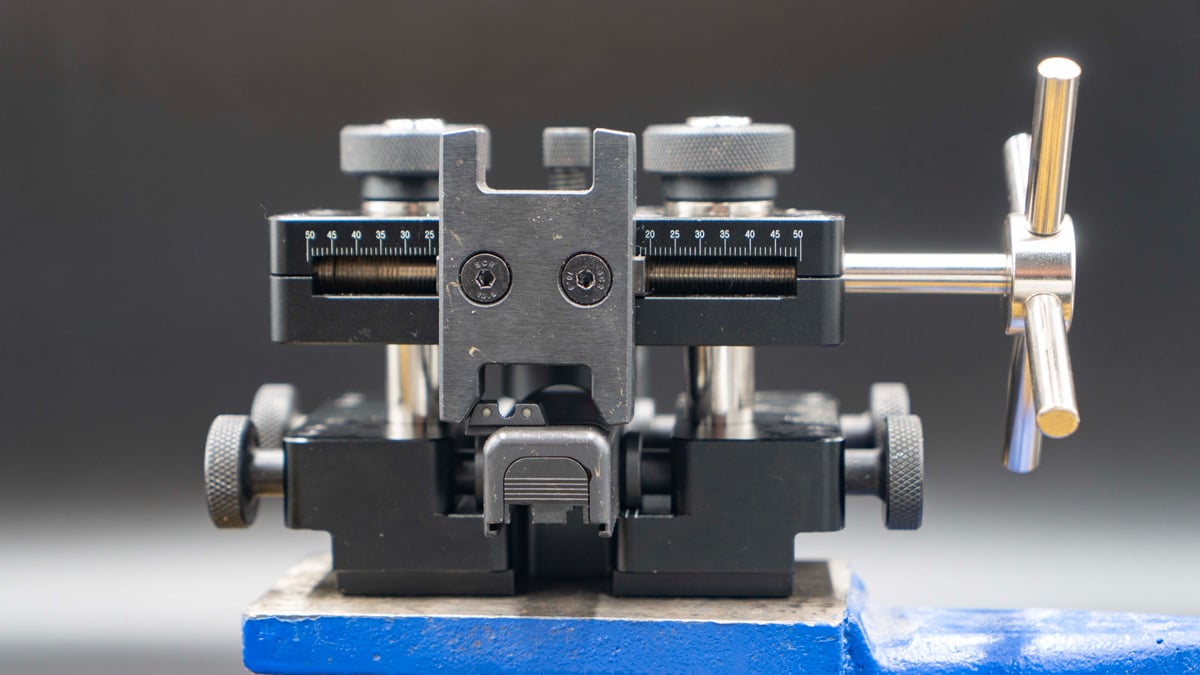
I’ve used ordinary brass punches and several different sight pushers over the years to remove the rear sight. I advise using a quality pusher. I also highly recommend getting the proper tool for removing the hex screw from the front sight. It is worth the low price to get the sight installed correctly.

For this install, I’ll actually be removing some older Night Fision night sights that I’ve had on my personal Glock 19 Gen 4 for several years now. I really like these sights, but I wanted to try something new.
Related: How to Install a Glock Trigger – 5 Easy Steps
I went with the relatively budget-friendly Meprolight Hyper-Bright featuring a green front sight. Before installing new sights, you’ll want to use some acetone to clean any oil off the screw threads and sight surfaces. Allow the parts to air dry.
Always remember to properly unload your firearm and disassemble it before doing any work on your gun. For sight installations, strip out the barrel and recoil spring from the slide and set them aside.
2. Front Sight Removal
Use your front sight tool to remove the hex screw inside the front of your Glock slide.
Again, using a purpose-built Glock 3/16-inch hex driver helps a ton here.

You may also need to use a punch to push (not pound) the sight post out of the slide. It sits inside an oval hole that can be very snug. You can also apply some oil here to loosen things up if needed.
Clean the top and inside of the front sight area with some acetone to remove any residual glue or oil and allow it to air dry.
3. Rear Sight Removal
Before you remove your rear sight, mark the location of the center of the old notch with a pencil on the slide. You can install your new sight to match this reference point.

Some rear sights also have a retaining screw. Never attempt to drive out the sight until you have loosened or removed that screw.
If you are using a sight pusher, start by securing the slide and aligning the sight with the pusher’s foot. Get the foot of the pusher as low as you can to the base of the sight without contacting the top of your Glock slide. If you are using a punch, wrap your slide in a protective layer of cloth or other material and carefully secure it in a vice.
Start turning your pusher or gently tapping out the rear sight with a punch. There’s no need to do this fast.
This sight was very dirty after years of heavy use. There was also a lot of glue used by the previous installer, so I had to take my time with my sight pusher. If the rear sight is very stubborn, you can always soak the rear dovetail area in an oil like CLP to loosen it.

4. Front Sight Installation
Clean your new front sight with some acetone to remove any oil from the threads and allow it to air dry. Apply a small drop of threadlocker (Loctite 609 is recommended for these Meprolight sights) to the front threads inside the screw hole in the front sight post. You can also put it on the threads of the screw.
Start by pushing your new front post into the top of the slide. It might require some adjusting to get it to press into the hole. Then carefully thread the screw from the inside of the slide.

Carefully hand-tighten the mounting screw while making sure not to twist the front sight out of alignment. Do not over-tighten. Five to 7 pounds of torque is enough for most sights with the threadlocker. Wipe away any excess glue from the surface.
5. Rear Sight Installation
Clean your new rear sight with acetone and allow it to air dry. The most important area to worry about here is the lower dovetail portion of the sight that will connect with the groove in your slide.
Apply threadlocker (Loctite 609 for the Meprolight sights) to the angled front and back walls of the slide’s dovetail. Do the same to the angled front and rear base of the rear sight. Only apply threadlocker if your sight instructions recommend it.
Use your rear sight tool to push the rear sight back into the slide.

Final Thoughts
Installing Glock night sights is a cinch if you have the right tools. But the payoffs are big. Night sights make your gun predictably easier to shoot in low-light conditions, and they often make it easier to shoot in bright light as well.
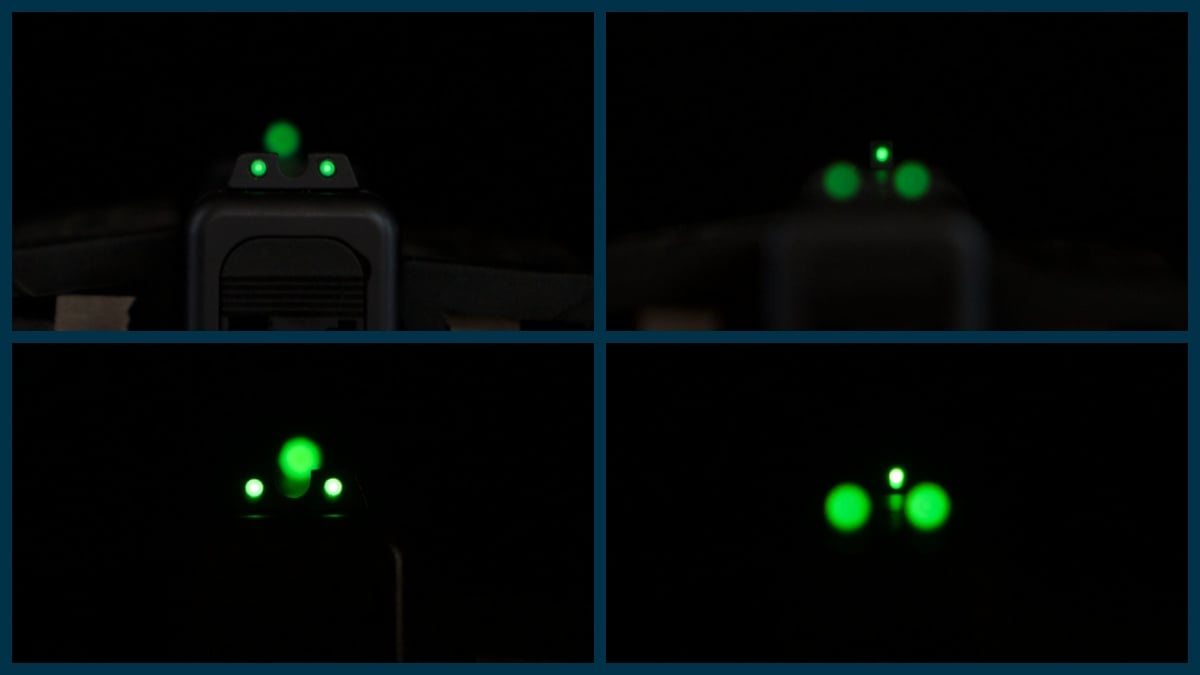
They also make it easier to locate your gun in the dark so you can orient your hand if you’re reaching into a dark safe or your bedside gun vault. Just make sure you do some training with them in a low-light environment to get used to the sights and the impact of things like muzzle flash or flashlights.