Video Instructions
Tools & Preparation
To get things started, you’ll need to snag an optic that fits your needs. We needed to mount a precision rifle scope on our Nemo Arms Executive Order chambered for .308 Win. Since we planned to test the gun for its best accuracy potential, our optic of choice was the quality but still affordably priced Vortex Strike Eagle 3-18x44mm FFP.
Once you have the optic you want to mount, you’ll need to grab the correct scope rings to go with it. These will be determined by the size of your scope’s tube, how high you want the optic to rest on your rifle, and the type of mounting base your rifle uses. In our case, as in most others, that base was your standard 1913 Picatinny.
You’ll also need some basic tools:
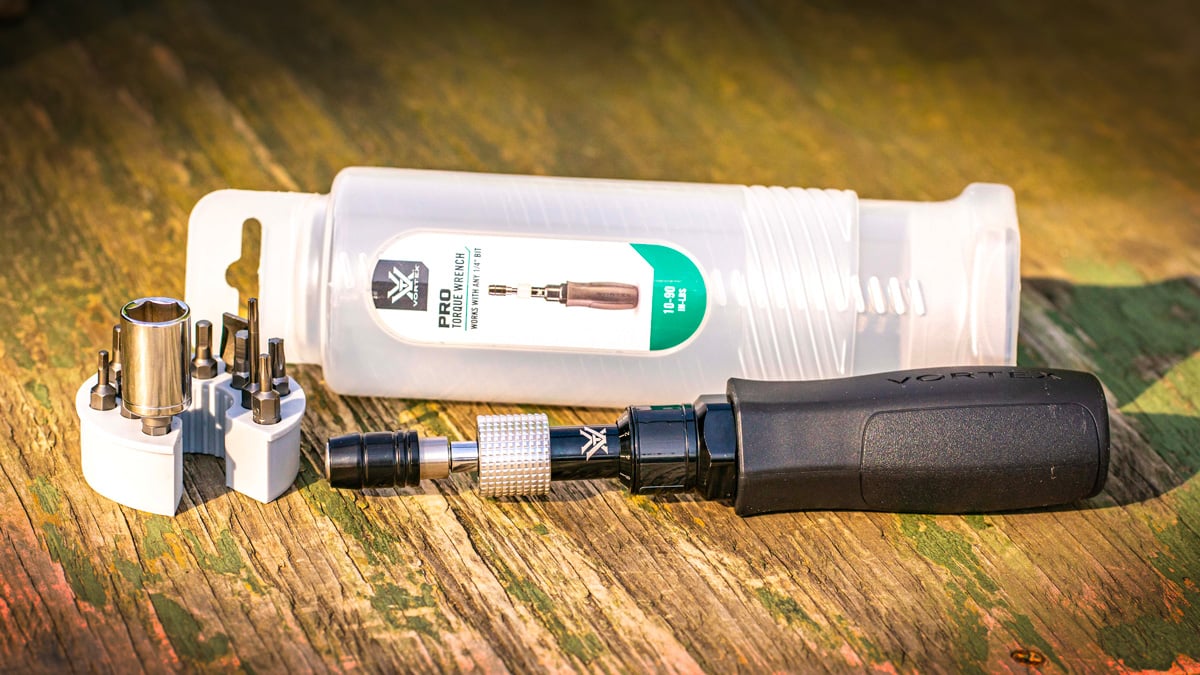
- Torque wrench/screwdriver with inch-pounds, NOT foot-pounds
- Wrench bits
- Bubble levels and/or plumb bob
- Flat bench with a rest or gun vice
- Loctite/thread locker, but ONLY if specifically stated in the scope/ring instructions
Finally, make sure your gun is completely cleared of any ammo and magazines and is safe before working on it. Your best bet is to do all the work in a location free of ammo and distractions altogether.
TIP: Don’t skimp on the torque wrench. You can use things like simple Allen wrenches and hex keys, but a good torque wrench will make things easier, and it will pay for itself over time by preventing damage or improper mounting issues.
Step 1: Secure the Scope Rings

Provided your firearm already has a base to mount your rings, the first step is to get just the bottom bases of your rings temporarily placed on the rifle. Space these out so they are not jammed up against the scope’s turrets or the bell-shaped front and rear ends of the optic.
You don’t want to put unnecessary tension on the optical lenses and parts inside the scope. Keeping the rings closer to the open portions of the scope tube will help avoid that when you tighten everything down.
TIP: Ensure your rings offer enough height for proper eye relief while preventing any part of the scope from touching the rifle itself. You should still be able to get your head comfortably behind the scope and operate all the rifle’s parts without any straining when the rifle is shouldered.
If you are mounting to a Picatinny rail, push the ring forward up against the front of the slot before gently tightening it enough to hold it in place.
TIP: ONLY if your scope/rings came with instructions to use a thread-locking compound like Loctite, add just a small amount to the screw threads before partially tightening them down. Well-machined parts likely won’t require anything at all, and wet Loctite or similar compounds can actually act as a lubricant. This may trick you into overtightening your screws and damaging the scope or rings.
Step 2: Place Your Optic

Position your optic on the base rings.
Ideally, your rings should rest no closer than 3/8 of an inch from your scope’s adjustment turrets. Avoid having the rings too close to the front objective lens bell or the rear magnification lens.
Anywhere around the middle of the open parts of the scope tube is the sweet spot. Now, you can add the top of the scope rings and gently tighten them down. Do not fully tighten anything yet. If your scope/rings came with instructions to use Loctite, add just a small amount to the screw threads before partially tightening them down.
The scope should remain stable when you shoulder the rifle, but you may need to move it a bit as we adjust it in the next step.
However, you can fully tighten your scope ring bases to the rifle’s receiver at this point. Use a torque wrench with the proper bit sizes and tighten to the recommended inch-pounds – NOT foot-pounds – state in your scope/ring instructions.
TIP: Large objective lenses (i.e., the front lens) may require higher scope rings for certain rifles. Test to make sure you can still operate the bolt or charging handle before continuing.
Step 3: Test the Sight Picture

Set your scope to its highest magnification. Shoulder the rifle and test the eye box (i.e., the space where your eye can see clearly through the scope without any shadows).
Loosen the scope rings and move the scope forward or backward to find a sweet spot where your eye has a consistently clear picture every time you shoulder the rifle.
Once you have the scope properly spaced for your eye, it’s time to align the reticle with the rifle using your bubble levels/plumb bob.
TIP: A decent scope should allow for some wiggle room when it comes to your eye box. Adjust the scope so you can shift your head forward and back just a bit while still maintaining a clear sight picture. Finding a nice middle spot will help you gain a clear sight picture in various shooting positions.
Related: Is It the Shooter or the Gun?
Step 4: Level Your Optic
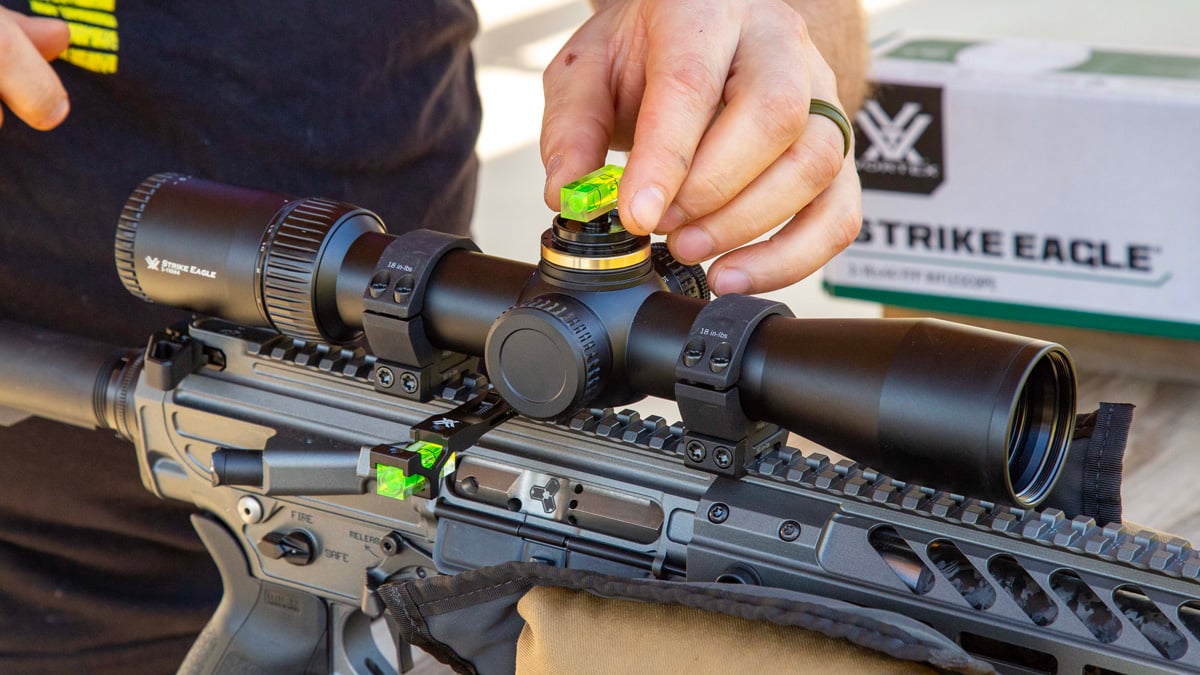
Place your rifle and scope into a vice or on a rest, using as flat and level a surface as you can find.
Find a flat spot on your rifle’s receiver or barrel to place a bubble level. This level will tell you that your rifle is lying perfectly flat before you tighten your scope down. Avoid using stocks and other furniture or parts because these may not be perfectly aligned with the gun’s barrel and receiver.
Place a second level on a flat portion of the scope.
TIP: You can take the top scope cap off the optic and place the level directly on the adjustment turret. This will better ensure you are aligning with the scope’s internal parts.

Plumb Bob Option: If you don’t have bubble levels, you can use a plumb bob. This is simply a string with a weighted end. Hang it so that gravity pulls the string nice and straight without any interference. Now, you can simply turn your optic to align the reticle with the perfectly vertical string.
Finally, loosen your rings and turn the optic until both the rifle and scope bubble levels are perfectly aligned.
Step 5: Incrementally Tighten

Tighten your scope rings gradually to ensure there is an even amount of tension across all the screws. Generally, the torque will be about 15 to 18 inch-pounds.
If your rings have multiple screws, incrementally tighten each of them until all the screws meet the recommended inch-pounds of pressure. Gradually tightening each screw will spread the pressure evenly and keep your scope level throughout the process.
TIP: One last time, unless stated in your scope/ring instructions, do not use liquid thread-locking compound. It can act as a lubricant and cause you to overtighten your screws and damage the parts and/or scope.
Zero Your Scope
Now that your scope is level, you can bore sight the optic by looking through the barrel and adjusting your turrets to align with a point downrange, or you can use a laser to get relatively close. From there, you’ll want to make sure you are on paper before attempting to zero at any longer ranges.
I tend to take my rifles to the 25- or 50-yard line for a quick one-shot test to make sure I’m at least hitting paper before I push out to 100 or 200 yards for my actual zero. However, I’ve also seen plenty of folks pull off near-perfect zeroes with just their eyeballs and basic bore sighting.
In either case, we’ve got a whole other article below to walk you through the zeroing process.
Related: How to Zero a Rifle Scope at 100 Yards
TIP: Don’t forget your zero stop! If you use a zero-stop ring or a similar device, make sure it’s handy when you do your final zeroing. It’s a real pain to get on the range only to realize that part was left behind.